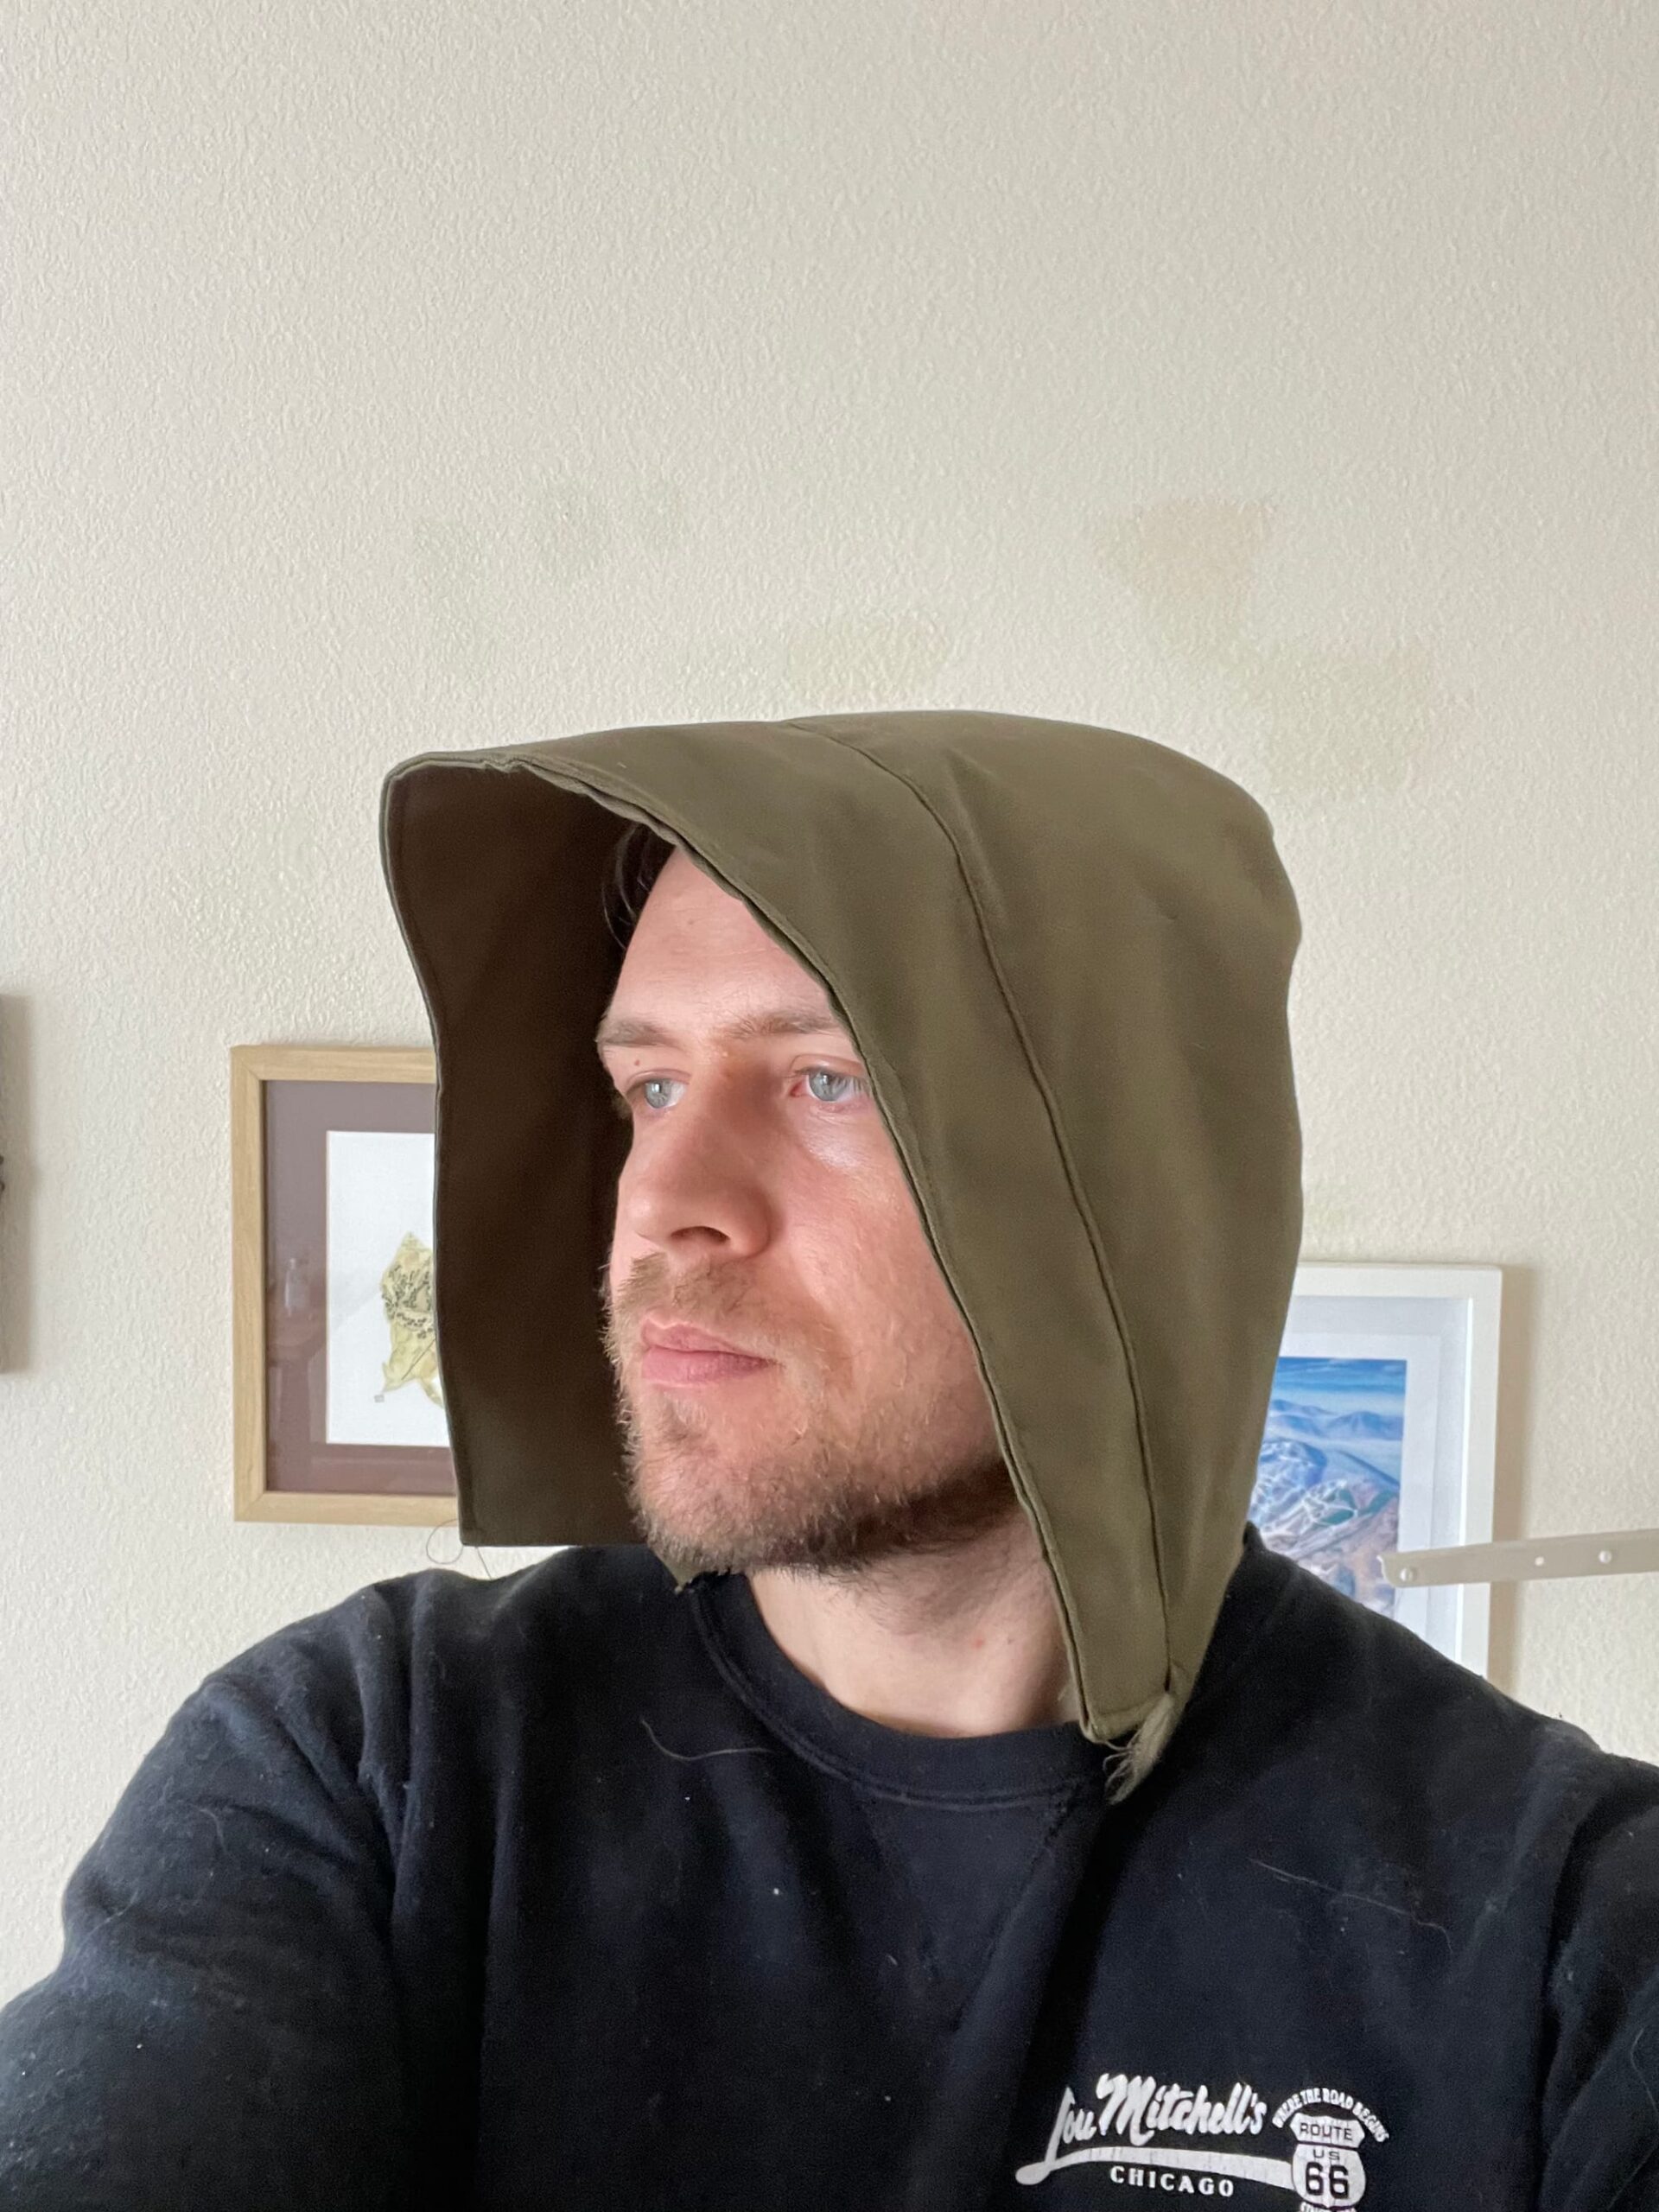
0.0.16 – Hood Sample #1
I sewed a sample of the hood based on the CLO pattern I made. Quick video here (if it doesn’t show up in the email, click through to view in browser):
What went well:
- The shape is functional.
- It fits well around the head
- The brim extends past the forehead, which should be good for preventing rain from falling on the face (hate a too-short hood)
- When I turn my head side to side, the hood follows me (hate a hood where you turn to the left and the hood doesn’t move when your head does, so you’re just looking at the inside of the hood and have to turn your whole shoulders in another direction 👀)
- I topstitched all seams on the hood, which provided good structure
- It looks good when up over the head, and down on the shoulders
What could be improved:
- There’s a gap in the panel on the back of the neck because I made one of the pieces (the plain rectangular panel) too short. I saw it would be a problem as I was putting the hood together but decided it would be best to construct everything and adjust based on the result.
- My wife thinks the gap actually looks pretty cool, creating a hinged helmet-like effect.
- Despite the lack of functionality of having a gap, there might be something in this accident to explore.
- Right now I don’t have a clear idea of what to do. I considered using clear PVC, but I would need to sandwich its edges between two layers of fabric and do the whole ID window thing again. I’ll think more about this, since it’s an opportunity to turn a mistake into a cool design attribute.
- There’s something in the hinged look that reminds me of the Raf Simons alien coat (AW ’06). Maybe I can take a cue from this and use a very different fabric here with some extra volume:
- My wife thinks the gap actually looks pretty cool, creating a hinged helmet-like effect.


- My wife also suggested adding reflective piping around that area. That would be functional too when the hood is up (protecting from rain in low visibility weather), and not visible when the hood’s down, so I’ll probably do that.
- The bottom-most hood pattern piece has some triangular pieces that point downward. The shape was wrong, and I had to snip those off unexpectedly to make the piece flat so I could attach it to the collar.
- In the sample, you’ll notice strange ‘tusks’ jutting forward from the hood. They affect the clean line of the garment and aren’t intentional. That said, they do look cool and unique to me, kind of insectoid, and don’t negatively affect functionality. It might be possible to make them functional (for example a throat latch to keep the wind out). I’ll have to think more about this.
- I felt a little pressure on my lower neck / upper shoulder where the collar piece is sewn to the hood. I think this may be due to the shape of the neck in the main body piece. I think the neck hole needs to be a little bigger and go slightly lower (not far, maybe an inch) down towards my back.
- The stitching of the brim isn’t that symmetrical, but this is mostly a function of rushing
Construction Notes
Here’s the ‘brim’ and the main piece. You’ll notice that these two are different lengths, but should be the same length. The brim (left) piece should be longer.

I’d probably sew reflective piping between these two pieces, since it would allow reflection to show both from a side view, and also while the hood is down.
Unfortunately I don’t have great photos of the remaining pieces, but there’s a piece that looks somewhat semicircular; a rectangle; and then a strip that goes on the bottom which gets sewn into the main body piece’s collar.
First, the rectangle and semicircle-ish piece are sewn together.
Then, the curved side of the right piece in the photo above gets pinned around the semicircle and sewn together, which you can see happening in the photos below:


See how the rectangular piece is too short?
Next, I added the last piece, and tried it on:


Then, I attached the hood to the jacket. You saw the video at the top of this post, here’s what the hood looks like when down. Some nice wizard vibes.

What’s Next
- I’ll need to make several adjustments in CLO:
- Elongate the relevant rectangular piece to address the hood gap
- Or lean into the hood gap somehow with a hinged panel..?
- Try to figure out what to do with the ‘tusks’ – can they be made functional? How?
- Adjust the piece that connects the hood to the collar to be ‘flat’ (remove the triangular points)
- Double-check the lengths of the semicircle-ish piece plus the rectangle piece against the curved part of the large piece that attaches along that length
- Reevaluate the shape of the ends of the large piece that attach to the semicircle-ish piece
- Elongate the relevant rectangular piece to address the hood gap
- Remove the downward-pointing triangular shape of the bottom piece and just make it a simple flat band that connects easily to the collar of the main body piece
- Make the collar of the main body piece a little larger and about an inch deeper toward the wearer’s back
- Print the adjusted hood pattern out
- Cut fabric and construct a second hood sample, adding reflective piping
- Remove the first sample of the hood from the coat, and replace it with the second sample.

No Comments